Bloglovin

Follow

Monday, 14 November 2016

Upcycled Kitchen Clock

Hiya my lovelies!
2 posts in 1 day... blimey!
I just wanted to share my most recent make.
I upcycled an old tray into a clock for my newly decorated kitchen.


I used 12x12" scrapbooking paper 'Market Street' by My Mind's Eye.
I love this design. I also used the numbers from 'Digitangle' Digikit for Serif.
Slapped on with Matte medium.
I used a clock timepiece & hands that I've had knocking around for ages.
Finished off with a coat of Matt 'Crystal Clear' spray to seal it.


Ta Da!
I'm really happy with it.
I love it when a plan comes together, don't you?

Cheers for stopping by & leave a comment!
Crafty Hugs
Sez x

Mixed Media Madness Couse


Hiya my lovelies!
I know it's been a while...
I lost my creative mojo for a bit. Being poorly does that to me sometimes.
You can read about that HERE.

Anyway I felt that I needed a bit of a kick up the bum!
So, I enroled on an online course,
Mixed Media Madness by Miriam Schulman @ The Inspiration Place
It's a great course especially if you are new to mixed media.
I felt inspired after watching the video tutorials and made
these canvases for my newly decorated kitchen!


Sometimes watching others kickstarts the creative juices!
I have also enroled on next years Wanderlust 2017 course.
So watch this space!

Cheers for stopping by & leave me a comment!
Crafty Hugs
Sez x


Thursday, 8 September 2016

Find Courage Mixed Media Canvas

Hiya my lovelies.
I'm back again!
I just wanted to share something
I've made for a friend of mine.

I used lots of MDF shapes from Things To Alter
& bits of broken jewellery. I also used my new
Decoart Media Fluid Acrylics & Vintage Lace Fresco Paint.
I also stamped onto the MDF ATC using Stay Strong Stamp
from Visible Image & Archival Ink in Jet Black.


I hope you like it as much as I enjoyed making it!
Cheers for stopping by & leave me a comment!
Crafty hugs
Sez x

Monday, 5 September 2016

Lunch Bags for school!

Hiya my lovelies!
I just wanted to share 2 bags I've been working on.
These lunch bags became a real hit a couple of years ago,
but I had to stop making them soon after starting work.
I just didn't have time or the energy!
I was asked if I could start doing them again,
although they now take me much longer, I decided why not?
So here are the latest ones:


Ready for the new school term!

Hope you like them as much as my
friends did.
Cheers for stopping by!
Feel free to leave a comment.
Crafty hugs
Sez x

Monday, 29 August 2016

PaperArtsy Bead, Charms & Dangle Challenge


Hiya my lovelies!
I've gone paper bead mad!
In my last post about paper beads
I showed the paper beads I'd made for a swap.
Well, over at PaperArtsy  the theme for the challenge is beads, charms & dangles!
Perfect!
I first had to decorate the paper.
I used Fresco Finish paints in London bus, Hey Pesto & Pumpkin Soup.
 Derwent Inktense Blocks in various colours & some Copper acrylic paint.
Once dry I stamped it with the clockwork heart & the cogs stamp from
PaperArtsy Eclectica Darcy 02 set in Black Archival Ink.


I cut my strips out and made some tapered beads:

 
Some round beads:


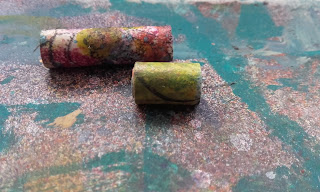
Some tube beads:


Some smaller tube beads:


I then glazed some using PaperArtsy Metallic Glaze:


Some in  PaperArtsy Gloss Glaze:


Some in PaperArtsy Pearl Glaze:


I chose the beads I wanted to use & decided my dangle would be earrings.
Don't look too closely at my loops, they're the best I could do with my dodgy hand!


So here's my entry for the challenge!
Go on over & take a peek at the other entries here.

Cheers for stopping by!
Feel free to leave me a comment.
Crafty hugs
Sez x

Sunday, 28 August 2016

Paper Beads for Swapping!

Hiya my lovelies!
I've been a busy bee...
Over on Jennibellie's Journal Workshops
the August Swap is Paper Beads!
It's my first time making them & it's also my first swap!
Excited Muchly!
I decided that I'd get myself a tool!
Cocktail sticks are ok but I need something I can hold thanks to my
dodgy arm/hand. I got mine here.
It makes beads with a 3mm hole.
All you need to do to start is grab some patterned paper.
Measure from 1 inch on one side down to nothing on the other,
up and down the paper & cut it out.
I just measured it & cut them out on my paper cutter.
You should end up with some skinny triangles!


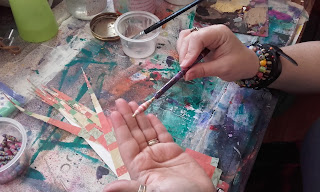
Then using the tool, slide the paper into the slot facing you & turn the tool away from you,
keeping the paper quite taught around the tool. You also need to guide the paper so it winds symmetrically. (You can wind it differently for a different shape bead.)


Once you get near the point of the triangle put some glue on it.
I used some PVA. Then continue to wind until the point is in the centre of your bead!
You will need to hold it for a bit so it sets.
Or you might find it springs back out of its tightly wound coil!


Voila paper bead!


I got a bit carried away & made more than I need for the swap,
but it's ok because I love them.
It gave the hand a bit of a workout I can tell you!
I dipped the ends of the straight beads into some copper paint before
glazing them all.


Here they are!


It's totally addictive!
Hope my swap partner likes them.
Cheers for stopping by!
Feel free to leave me some love...
Crafty hugs
Sez x

Friday, 19 August 2016

My Cosmic Gown


Hiya my lovelies!
I've got something a bit different to share today...
My little brother (who's not so little) got married in New York a few weeks ago!
The newlyweds had a reception here when they got back.

I originally got my dress from the Oxfam website.
I fell in love with it but wanted to tweak it a bit.
So, I decided to 'decorate' it.
I started by masking off the top of the dress.
I wanted to keep this plain.
I got out my Decoart Media Misters and my Daler Rowney
Pearlescent Acrylic Inks & basically went bonkers with them!
I had to take it outside after realising I'd got it all over my floor...
(I always realise after) but it cleaned up with baby wipes!
Round two was done in the garden hung up on the washing line.

Close up

It shines all different colours in the light!


I was over the moon with the results!
My very own cosmic, shimmery gown.

I had to make the happy couple a card too!
I used a stencil from TCW Mini Life Remembered & used some
pink and blue Daler Rowney pearlescent Acrylic Ink & sponged it on
as a background. Once dry I stamped the metal patchwork heart stamp from
PaperArtsy Eclectica Darcy 02 set for my brother (he's a welder) &
I used the word heart stamp from PaperArtsy Eclectica Darcy 01
set for his wife (she's a teacher) Get it?
Anyway, I went round the edges with Archival Ink in Watering Can
which I also used on the stamps!
Ta da!
My version of a CAS card which is a first! 

Now it was all going to plan until the day of the reception...
I spent most of the day sorting my tribe out (there's quite a few of us, 6 to be exact)
& getting ready. This takes me so much longer to do now.
Troweled enough make up on to render a wall,
remembering not to put my dress on til last,
otherwise I'd get it dirty before we'd even left the house!
Stepped in my dress to put it on & after 3 of us trying to
squeeze me into it & do the zip up,
it wasn't happening.
Yep, I've put on so much weight in 4 weeks it doesn't fit!
BLOOMIN' MEDS!!!

All was not lost, I had a back up dress.
All girls have a back up dress.
Still, I'm sad I didn't get to wear my cosmic gown.
One day...

Cheers for stopping by!
Feel free to leave a comment.
Crafty hugs
Sez x


Painted Bag

Hiya my lovelies!
After a break from doing the painted bags & some persuasion
from people who like my FB Page,
I decided to bring them back!

I was unsure if I would still be able to do them as my arm plays up
constantly but I have managed it. Took me longer than it used to though!
Now my arm is telling me off & I'll have to pace myself but I'm really
pleased with how it turned out. At least I know I can still do them.
More importantly Mrs Woodgates was happy too!


Let me know what you think in the comments!
Cheers for stopping by.
Crafty hugs
Sez x

Sunday, 14 August 2016

PaperArtsy Pattern Challenge

Hiya my lovelies!
I'm actually going to enter a challenge!!!!
Woo hoo!
It has been too long, I know.
This project is for the PaperArtsy Pattern Challenge.
I found an old Amazon box, (other online stores are available)
you know the ones like a folder, & thought I'd give it a paint!

Items for this project are:


I'll tell you what I used as we go along anyway!
Ok, I started by gessoing the entire folder.
I then squirted Spanish Mulberry, Pansy, Concrete & South Pacific
Fresco Finish Paint (my fave colours)
& used a dry brush to slap them on! I love this technique because
you never know how it will turn out! Fabulous!


Turned out like this!


I then painted a coat of South Pacific & let it dry with the help
of my trusty heat gun. (I was getting impatient!)
I then dry brushed another coat on top.
Love the result!


On the hinge parts of the folder I stamped a hinge image
from the HP1103 set 2 inches down from the top & 2 inches up from the bottom.
I did this on each one using Jet Black Archival Ink.
I then stamped the lock from the same set.
I stamped the big stamp along the top & bottom using Watering Can Archival Ink.
Then using the leaf stamp I created some patterns.
These were in Watering Can Archival Ink too.


I then went around the edges with the hollow circle strip stamp from FR4 set
in Watering can Archival Ink. I then squirted some Pumpkin Soup Fresco
onto a palette & stamped circles using an old tape tube.
I lined up the rest of the stamps in FR4 set to make a pattern
& stamped the flaps using Watering Can Archival Ink. I also
stamped on the other side in the same ink but I used the cog stamp from EDY01.
I used some low tack masking tape around the area so I didn't overstamp.
I like to use this grey colour for stamping backgrounds as it doesn't stand out too much.


I decided to overstamp the lock & hinge stamps using Copper Pearlised Paint.
I also used this to paint a rectangle inside on the top flap and around the edges.
I overstamped the copper rectangle inside with the
Happiness stamp from HP1103 using Jet Black Archival Ink.
I added a piece of ribbon and a handmade (by me) polymer clay
bead as a closure & a notebook & pen.


Voila!
I really like how it turned out.
Cheers for stopping by.
Leave me some love & come back soon!
Crafty Hugs
Sez x


Saturday, 13 August 2016

Other Interests

Hiya my lovelies!
Just a quick post to let you all know that I have started another blog!
It's purpose is to help me vent, connect with others and to share my journey.
As I have mentioned in previous posts, I have a chronic illness called Fibromyalgia.
I want to spread awareness and help others with this illness.
Maybe you know someone who has Fibro or maybe you are curious to know more about it
or just want to get to know me better. I can promise there will probably be lots of oversharing!
If you want to share my journey with me, Mr. Golf and the Tribe then please take a look.


If not, then thanks for reading this far.
Cheers for being here and come back soon!
Crafty hugs
Sez x

Thursday, 11 August 2016

Summer Catch up

Hiya my lovelies!
How's your summer been? Hope it's been great!
Ok, some of you that still follow me
(I thank you from the bottom of my heart),
will know I've been a poorly bug. I still struggle but you know what,
don't we all from time to time?
I have managed to paint a bit and make cards
for the kids in my class during my time off.


The photo above is of the card(s) I made the kids in my class.
There's only one in the photo but you know what I mean... anyway,
I wrote out the quote which is from Dr Seuss and coloured it in.
 Now I think the kids are great, but I am in no way doing it 30 times! 
So I scanned it, shrunk it and printed 30 off... cheating I don't think so!
Added a sweetie and a message and they were good to go!
I took them in on the last day of term and gave them out.


Before
After
 Right, next I painted a post holder (if that's what they're called?) I got it in a discount shop. (posh for pound shop) It was boring and white. It was crying out for some paint so I gave it a makeover!


It's now totally lush and worthy of a place in my home!

I have also been commissioned to paint a bag... yeah I know I put them on hold, but I've still got a few left and why not?! So if you want one let me know via my FB or leave a comment!
I'll do a post when it's finished.

My lovely husband, (known to you as Mr. Golf) is great at bringing home items for me to makeover. We are a right pair of 'Skip Rats'!
I currently have a room divider (waiting for hinge repair before I can start on it), 3 mirrors, a table and chairs set for the garden and numerous other gems!
It keeps me busy planning on what I will do with and to them!
Love to recycle and repurpose!

I've also spent some of my time doing courses on Udemy.
What a great platform! I'm totally into lifelong learning and if you are then check it out. No, I'm not affiliated! I also search up stuff on YouTube which is free. (If you don't count the cost of WIFI) I'm not affiliated with them either!

Anyway I digress, I'd like to thank you for reading this far. It's been really nice writing this post, really helpful as hand exercise but also connecting with you. It's why bloggers blog. Connecting with other like minded individuals. So cheers to being here and I hope you come back soon!

Crafty Hugs
Sez x


Friday, 3 June 2016

Art For Healing

Hiya my lovelies!
I know, I know! A bit longer than anticipated,
but I have managed to make some art 
and this is gonna get a bit deep!

So here it is!

'Layers of Pain'

I decided to paint with my hands and fingers.
I have had trouble using my arms lately,
but I figured it might help!
I wanted to use my pain to fuel this piece
and tapped into my intuition.
I feel pain in 'layers' so I chose different colours
and textures to represent them.
For instance, red is 'burning', white is 'stabbing'
and the glitter is 'pins and needles'.
The black is the darkness of isolation and despair.
Sounds depressing and it is, but I found a real connection
painting this using my intuition.


It is ME on canvas.
Whoa deep stuff eh?!
You might think that I find it difficult to look at, but I don't.
To me, it is beautiful.
Pain tears you down but you can use it to build you up.
I choose to let it build me up - make me stronger.


Creating this piece has helped me feel more empowered.
I know art shouldn't need explaining, it's subjective after all,
but I felt the need to tell you all what it means to me.

Art can be used to heal
so that's what I'm going to do!

I really appreciate you stopping by!
Please feel free to comment.
Crafty Hugs
Sez x